Lesson 2 | Coordinate relationships
Using the module
Preparing to create your first bracket
This upcoming assignment will have you work through your first bracket of the course. To be able to do so, you are going to need to know how to use the Discourse module. (On the Assignment pages, the module will be within the page itself, prepared for you to use, and so you won't need to know everything in the following instructions. But they will help you prepare your own bracket within the Discourse module.)
Using the Discourse module
Create a new module.
Click the gray + icon whenever you want to add a module. Then, select Bracket and choose a passage and text(s)
Understand editing mode.
When you want to make changes to your bracket, toggle Editing on. You may also use the spacebar as a shortcut for toggling in and out of editing mode.
Adjust how Bible versions are displayed.
Click the passage reference at the top of the module to add, remove, and hide Bible versions. Use the column dots to adjust their width.
Split propositions.
Click on a word to have it begin a new proposition. Click an X on the left to rejoin two propositions.

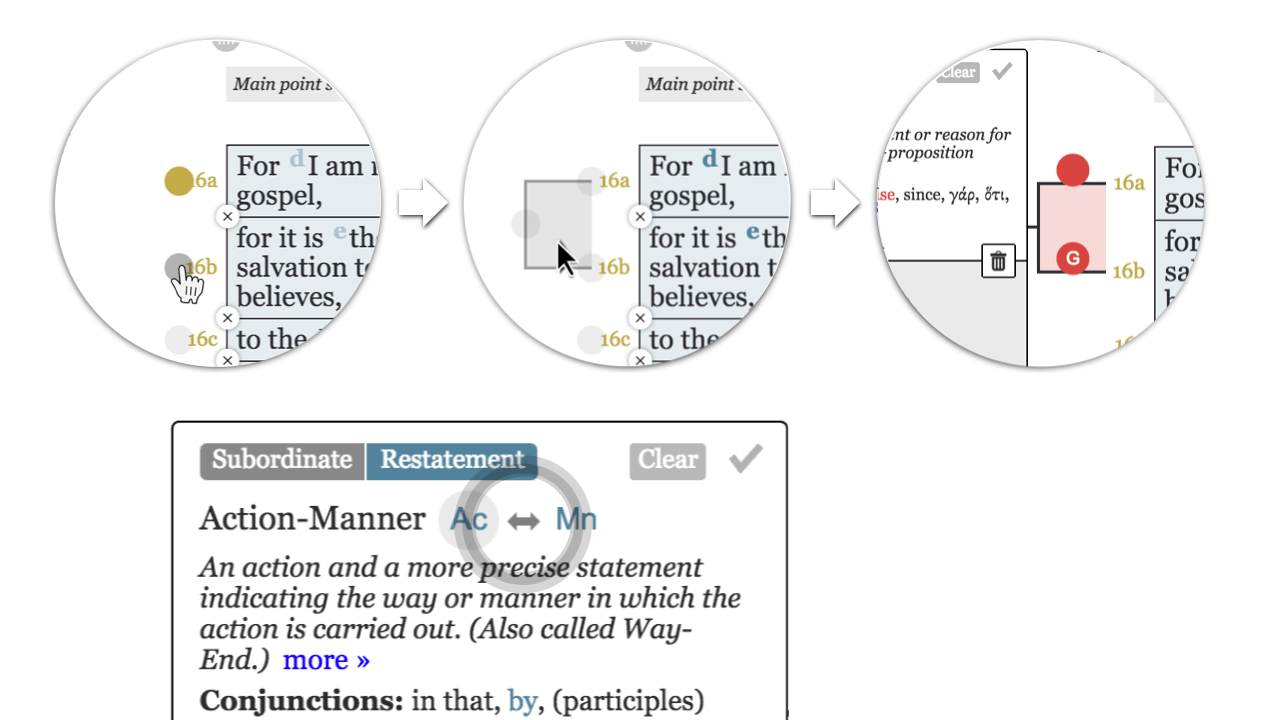
Draw brackets and indicate relationships.
Click the dots where you would like the bracket to begin and end. Indicate a relationship by clicking the new bracket. Click the double arrow to switch the order of a relationship.
Know when you are done.
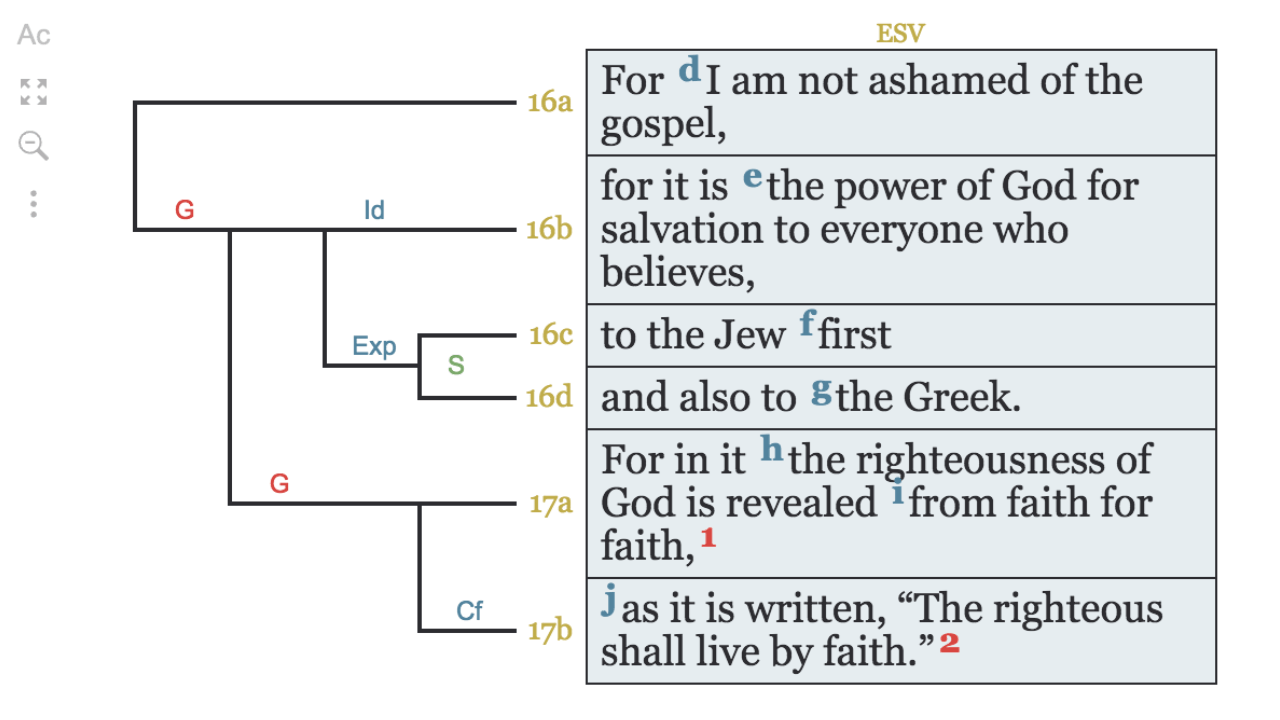
You know you have indicated all necessary relationships when you have a bracket over the entire passage and none of the brackets are grey.
Use dot notes.
Record insights and questions as you arc by using the round + button that appears next to the Editing toggle when in Editing mode.