Lesson 2 | Expansion
The Arcing/Bracketing Module
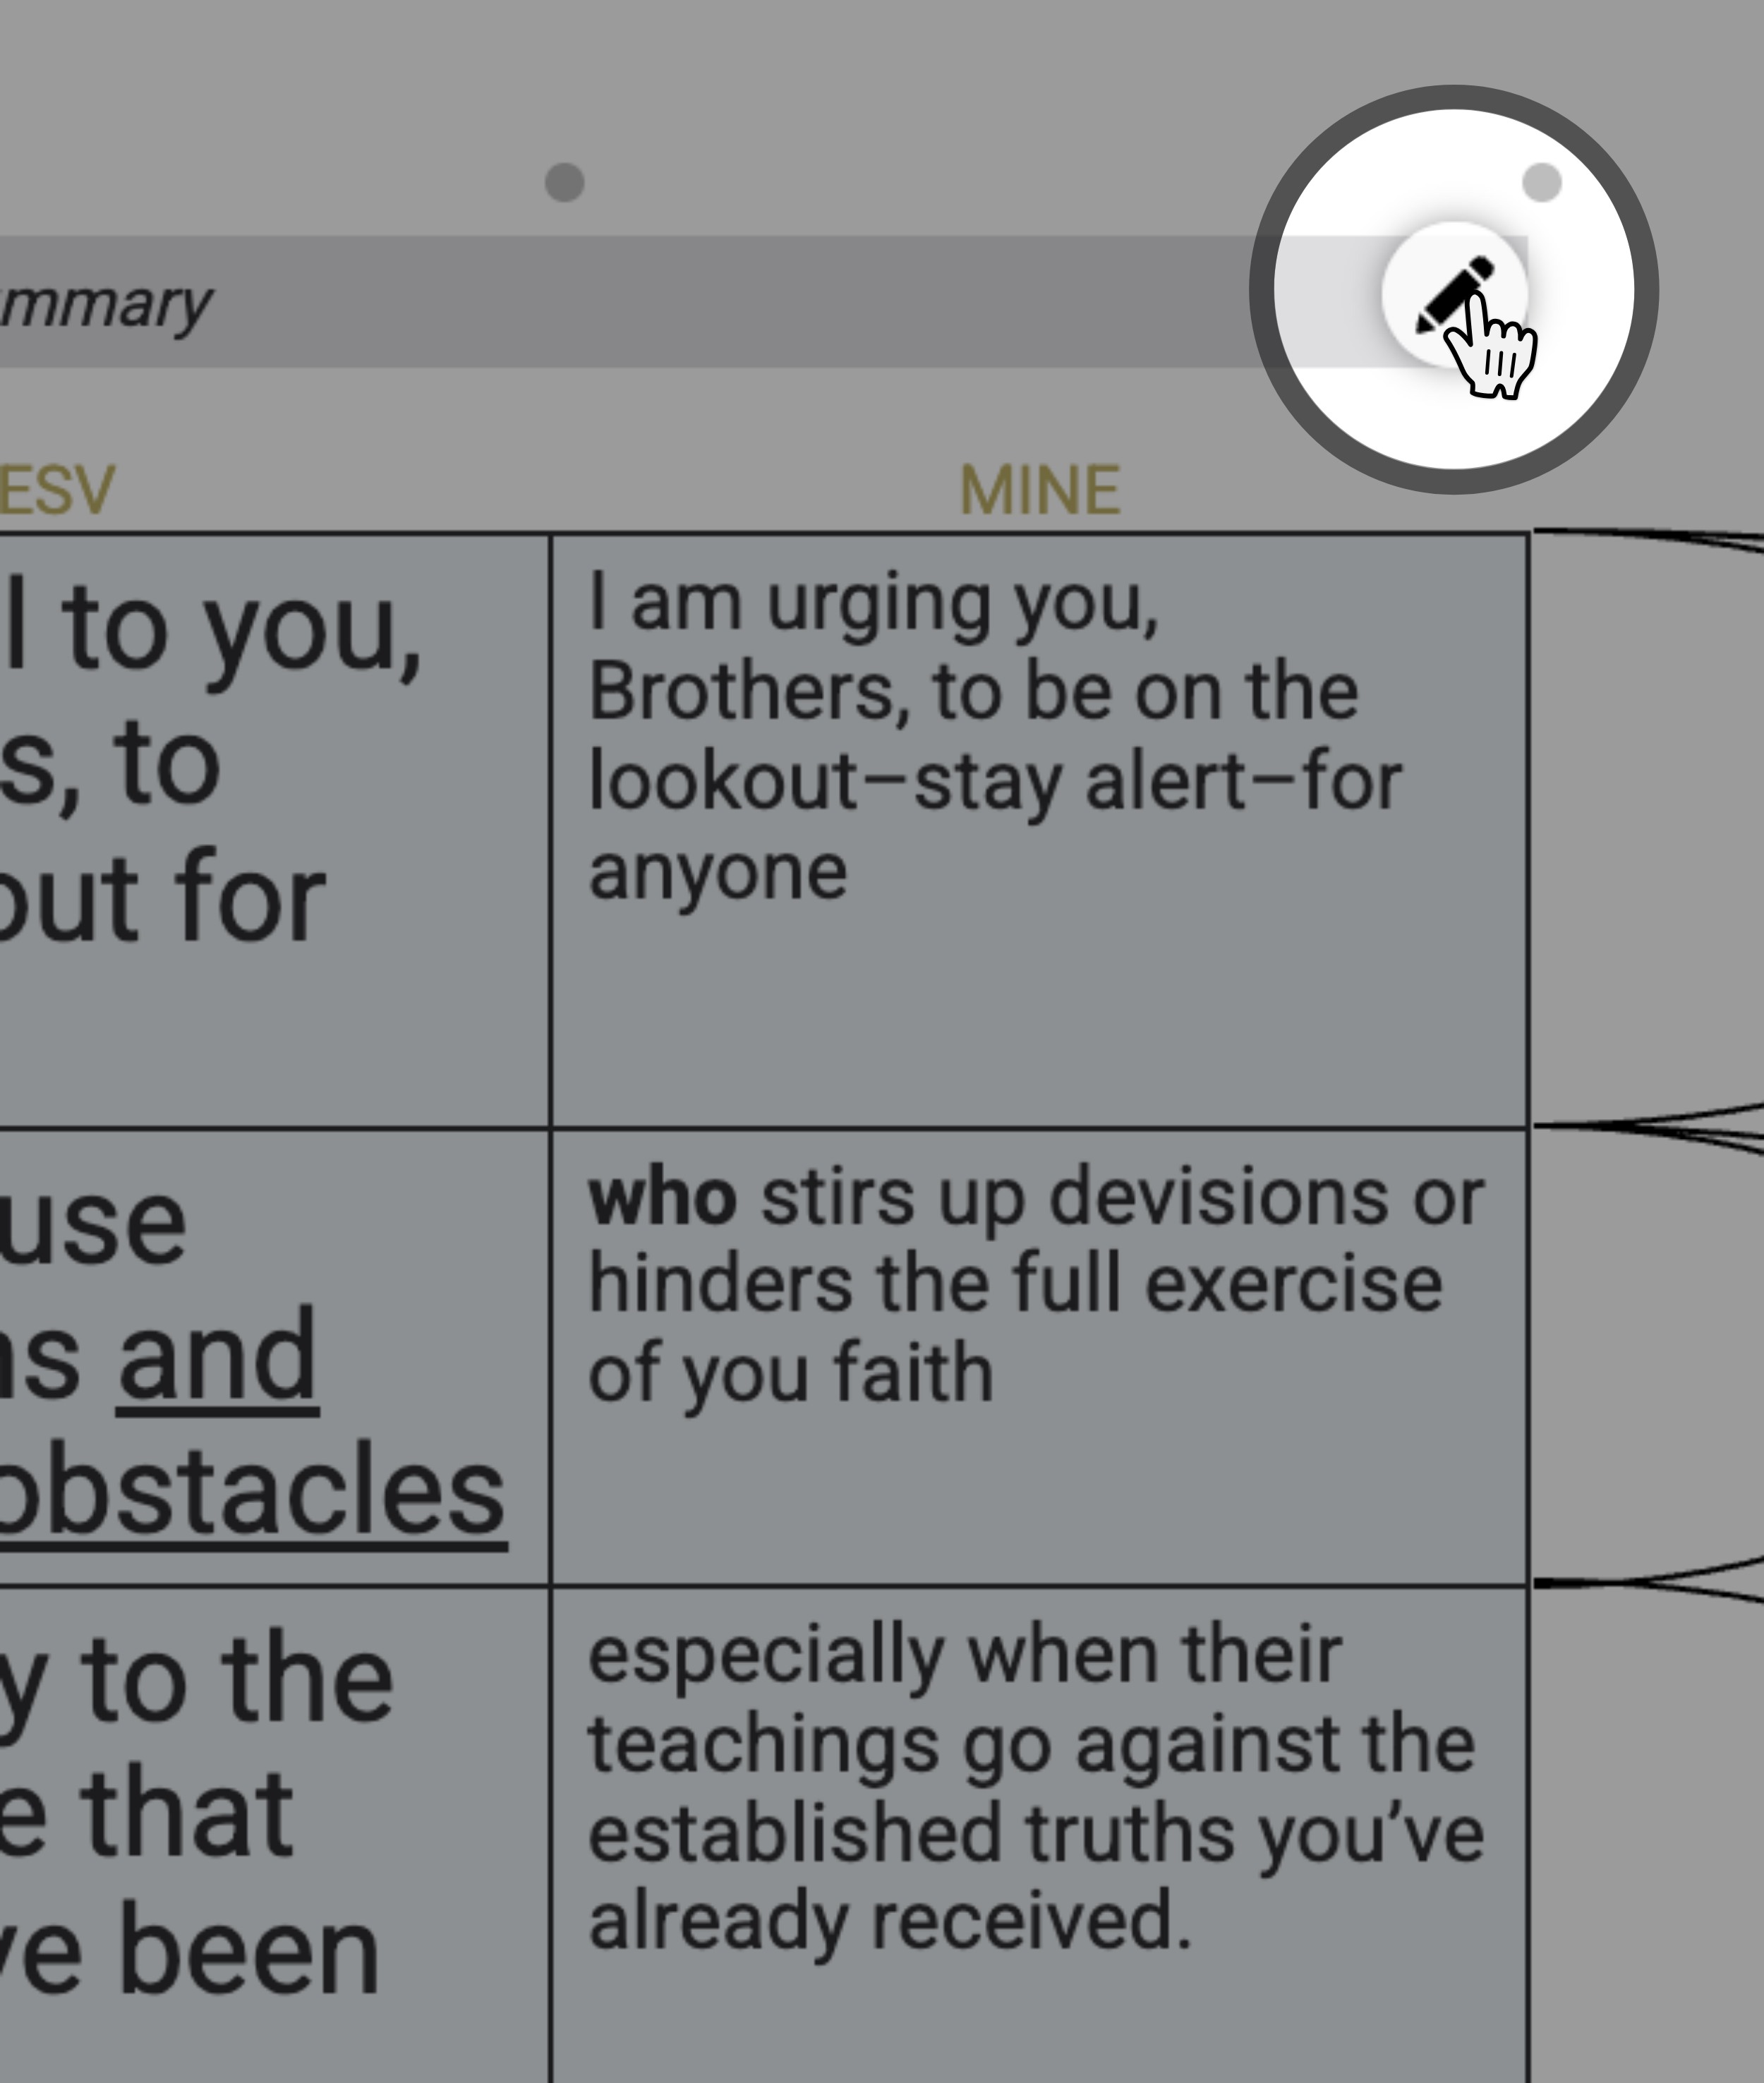
Biblearc integrates paraphrases within the Arcing/Bracketing module. So to effectively use paraphrasing on Biblearc, you’ll need to understand the full capabilities of this module.
Creating an Arc or Bracket
The first step in making a good paraphrase is to begin an arc or bracket of the passage. This course assumes that you have already learned how to create an arc or a bracket. If you need a refresher, please take a moment to review the instructions in the Bracketing Course.
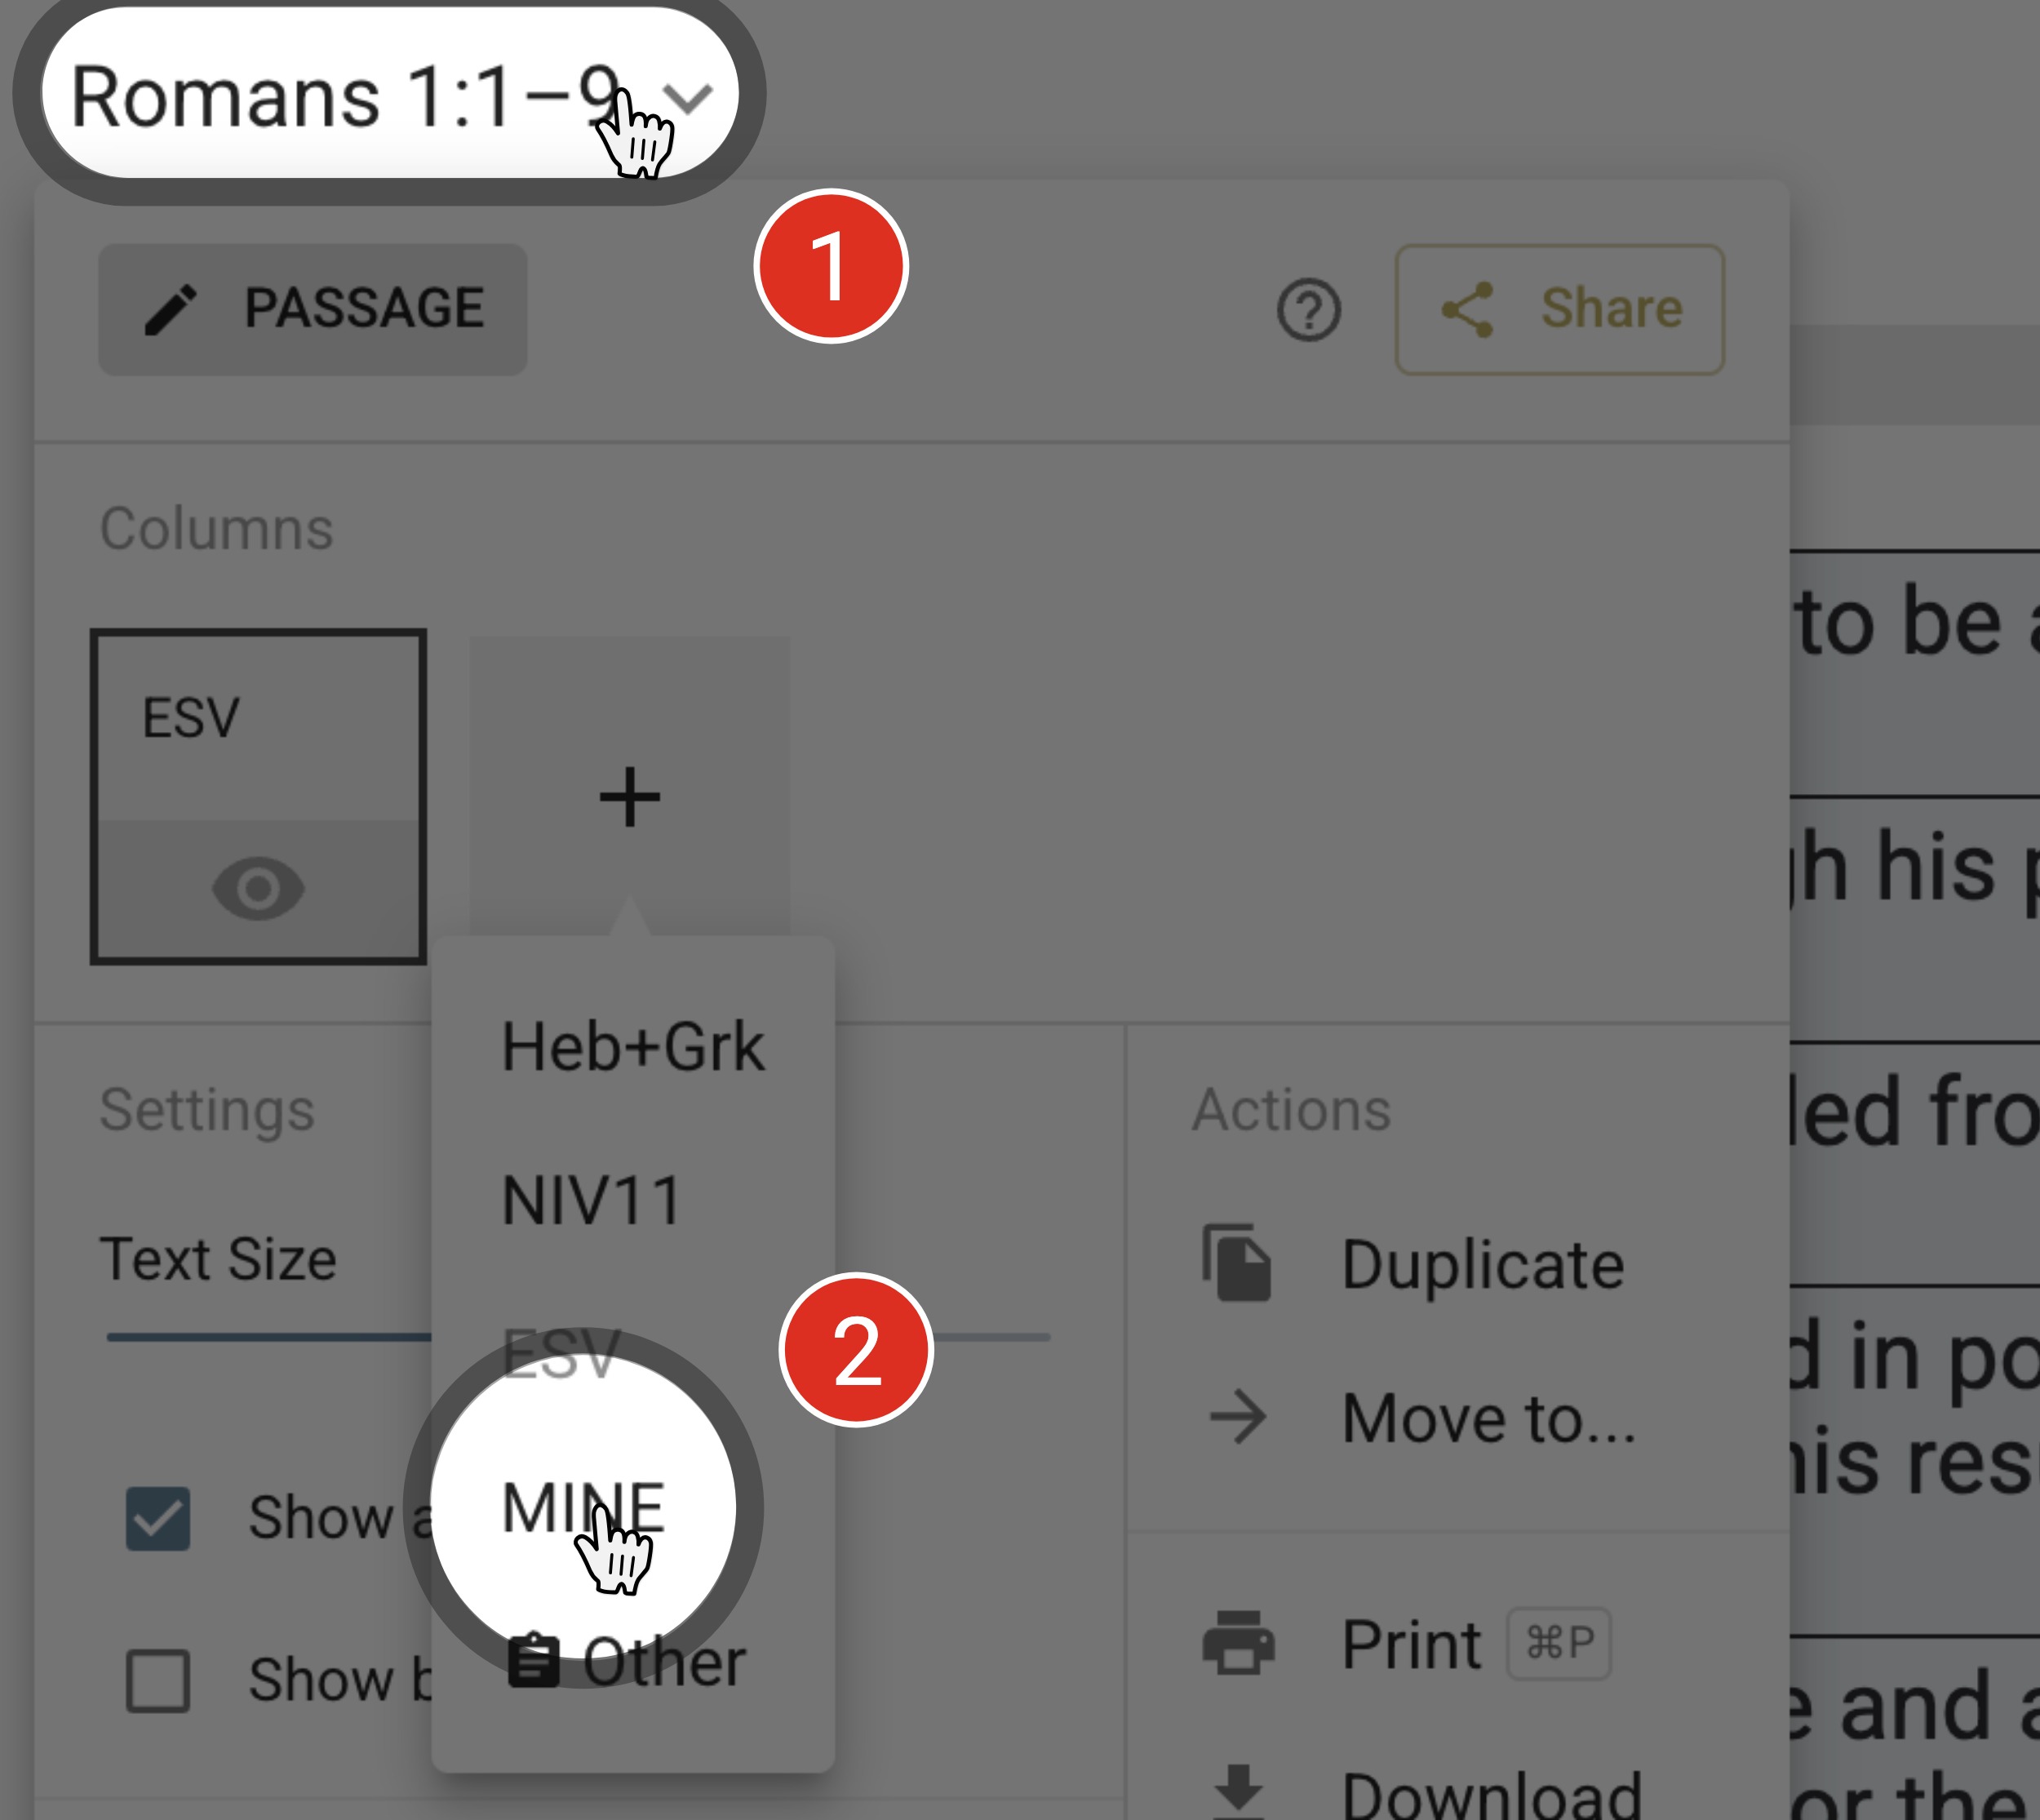
Adding a MINE Column
When you are ready to start testing your bracket by writing a paraphrase, you’ll need to load the MINE column. Click on the passage reference at the top-left corner of the module, and then on the square with the + sign. You will find the MINE option at the bottom of the list that appears.
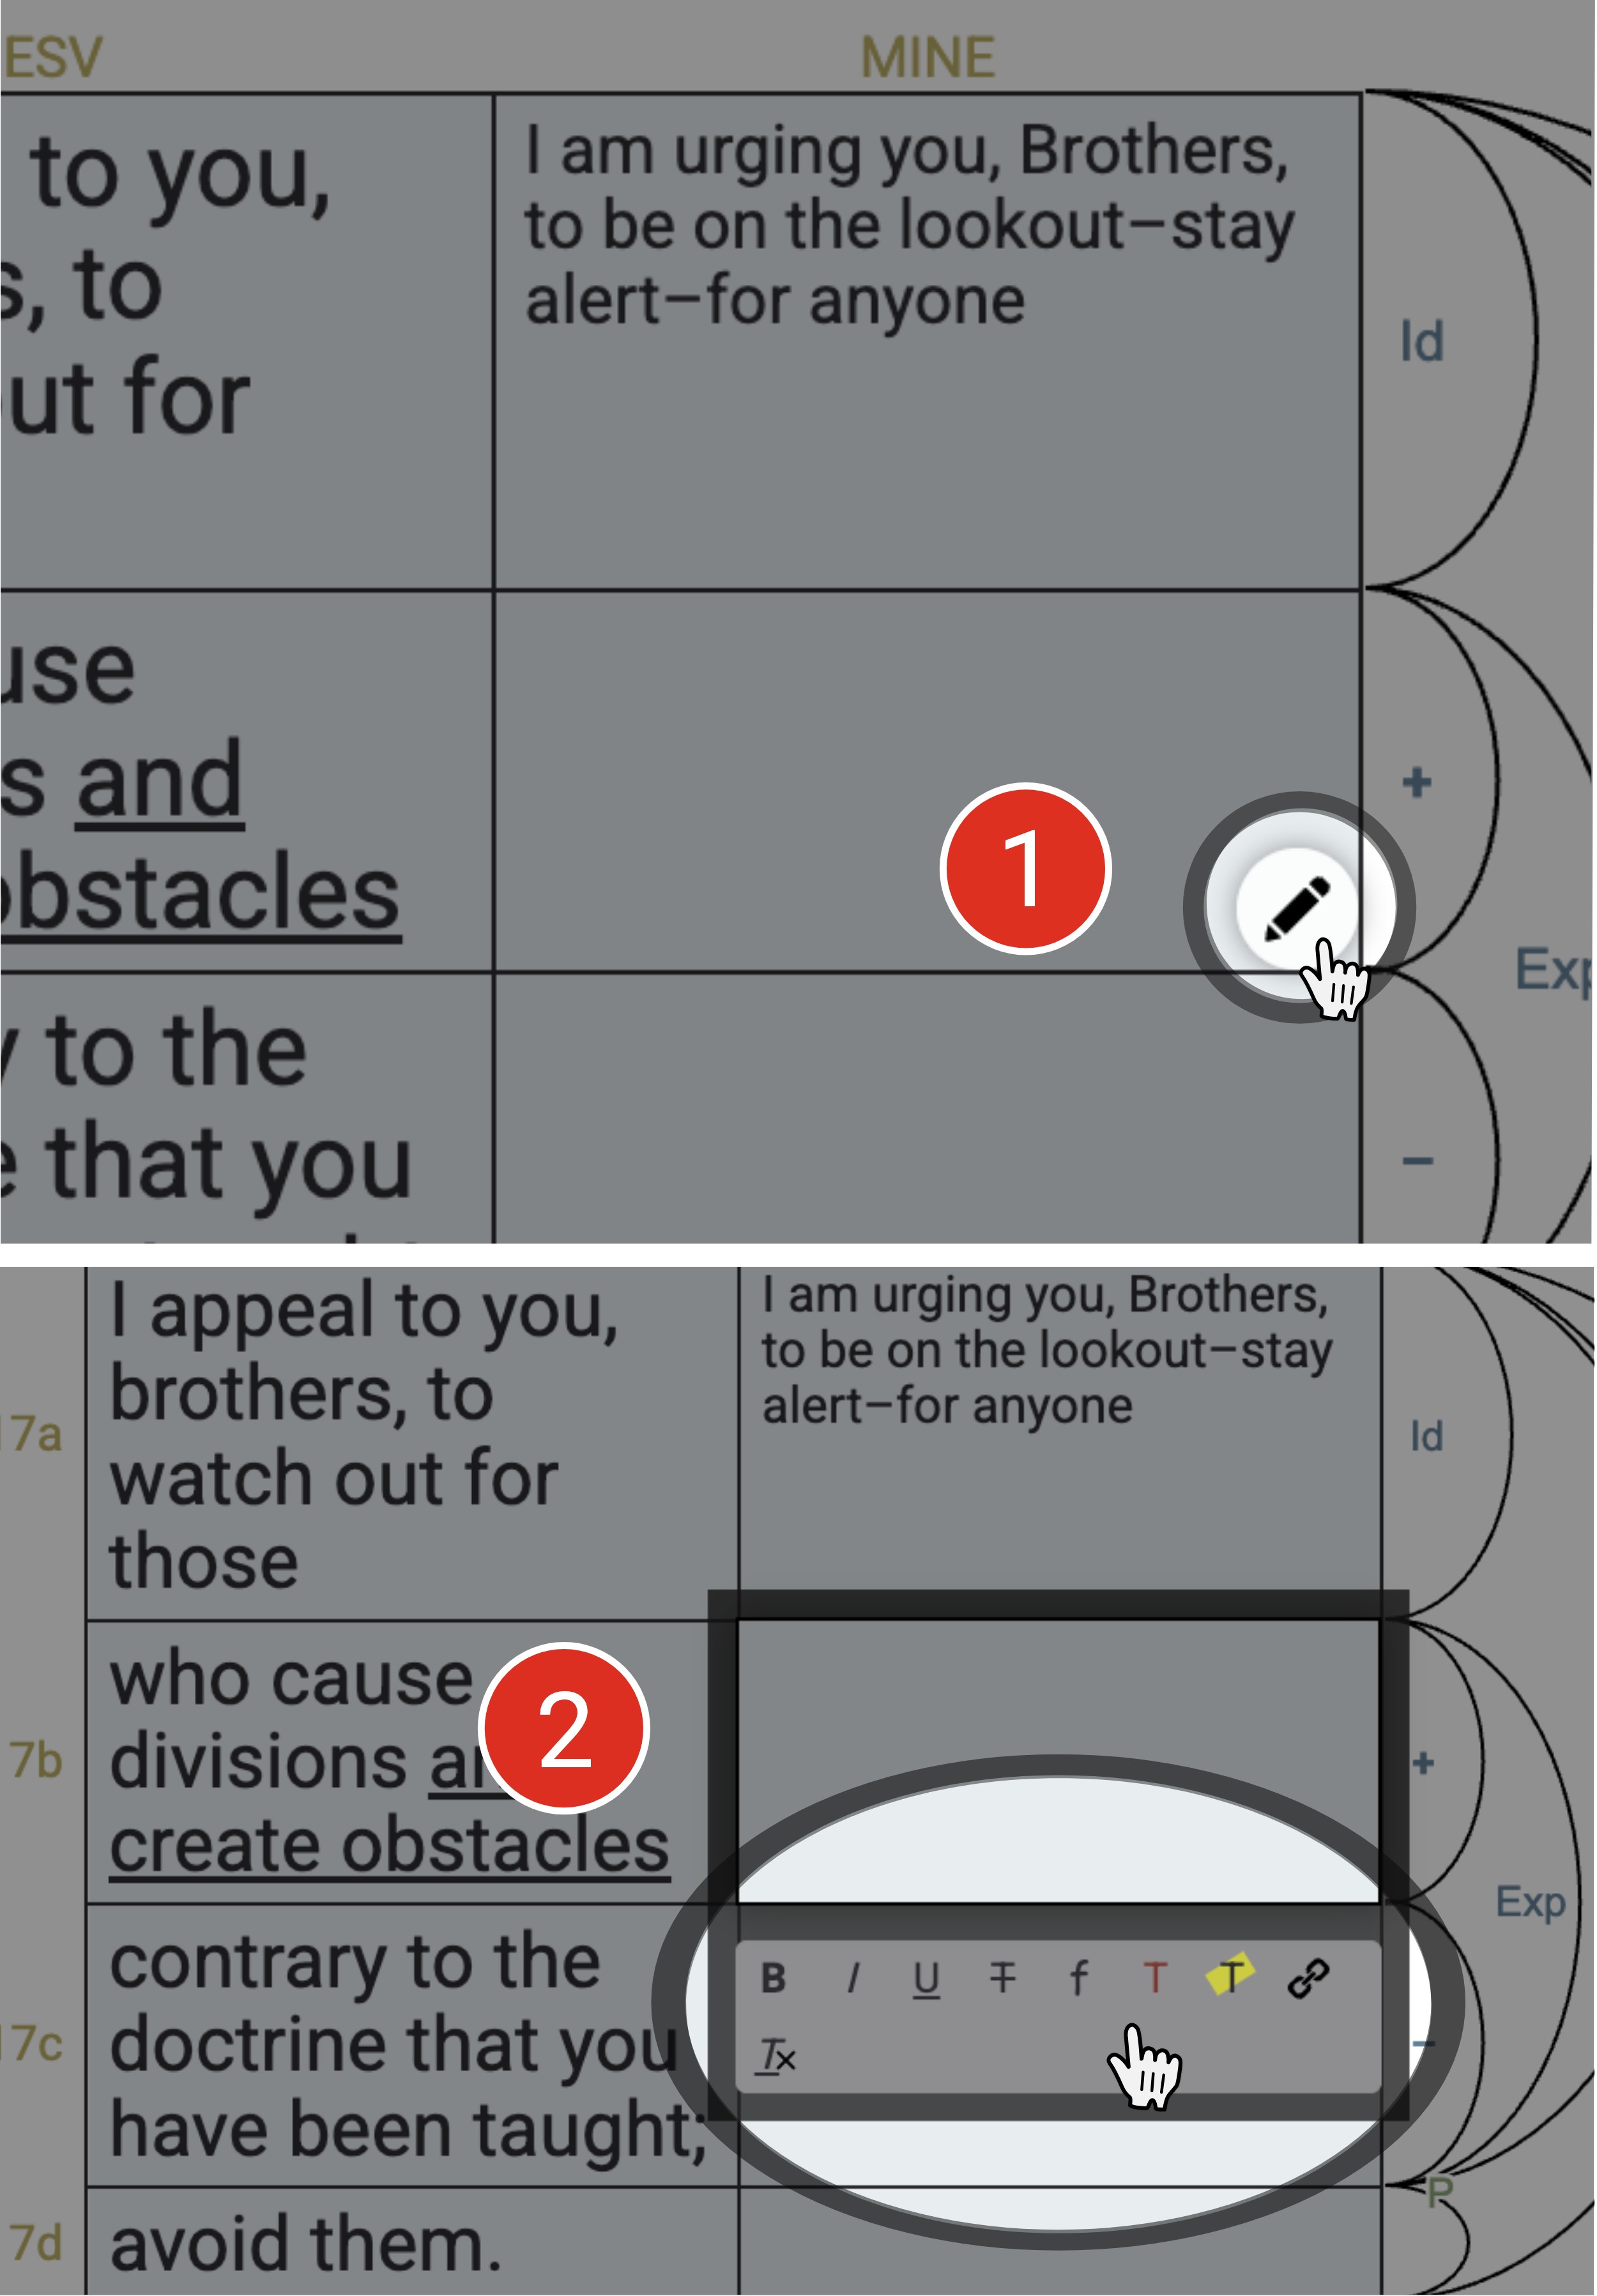
Editing the Text
When in editing mode, a pencil icon will appear when hovering over any blue box. Click it to add or edit.
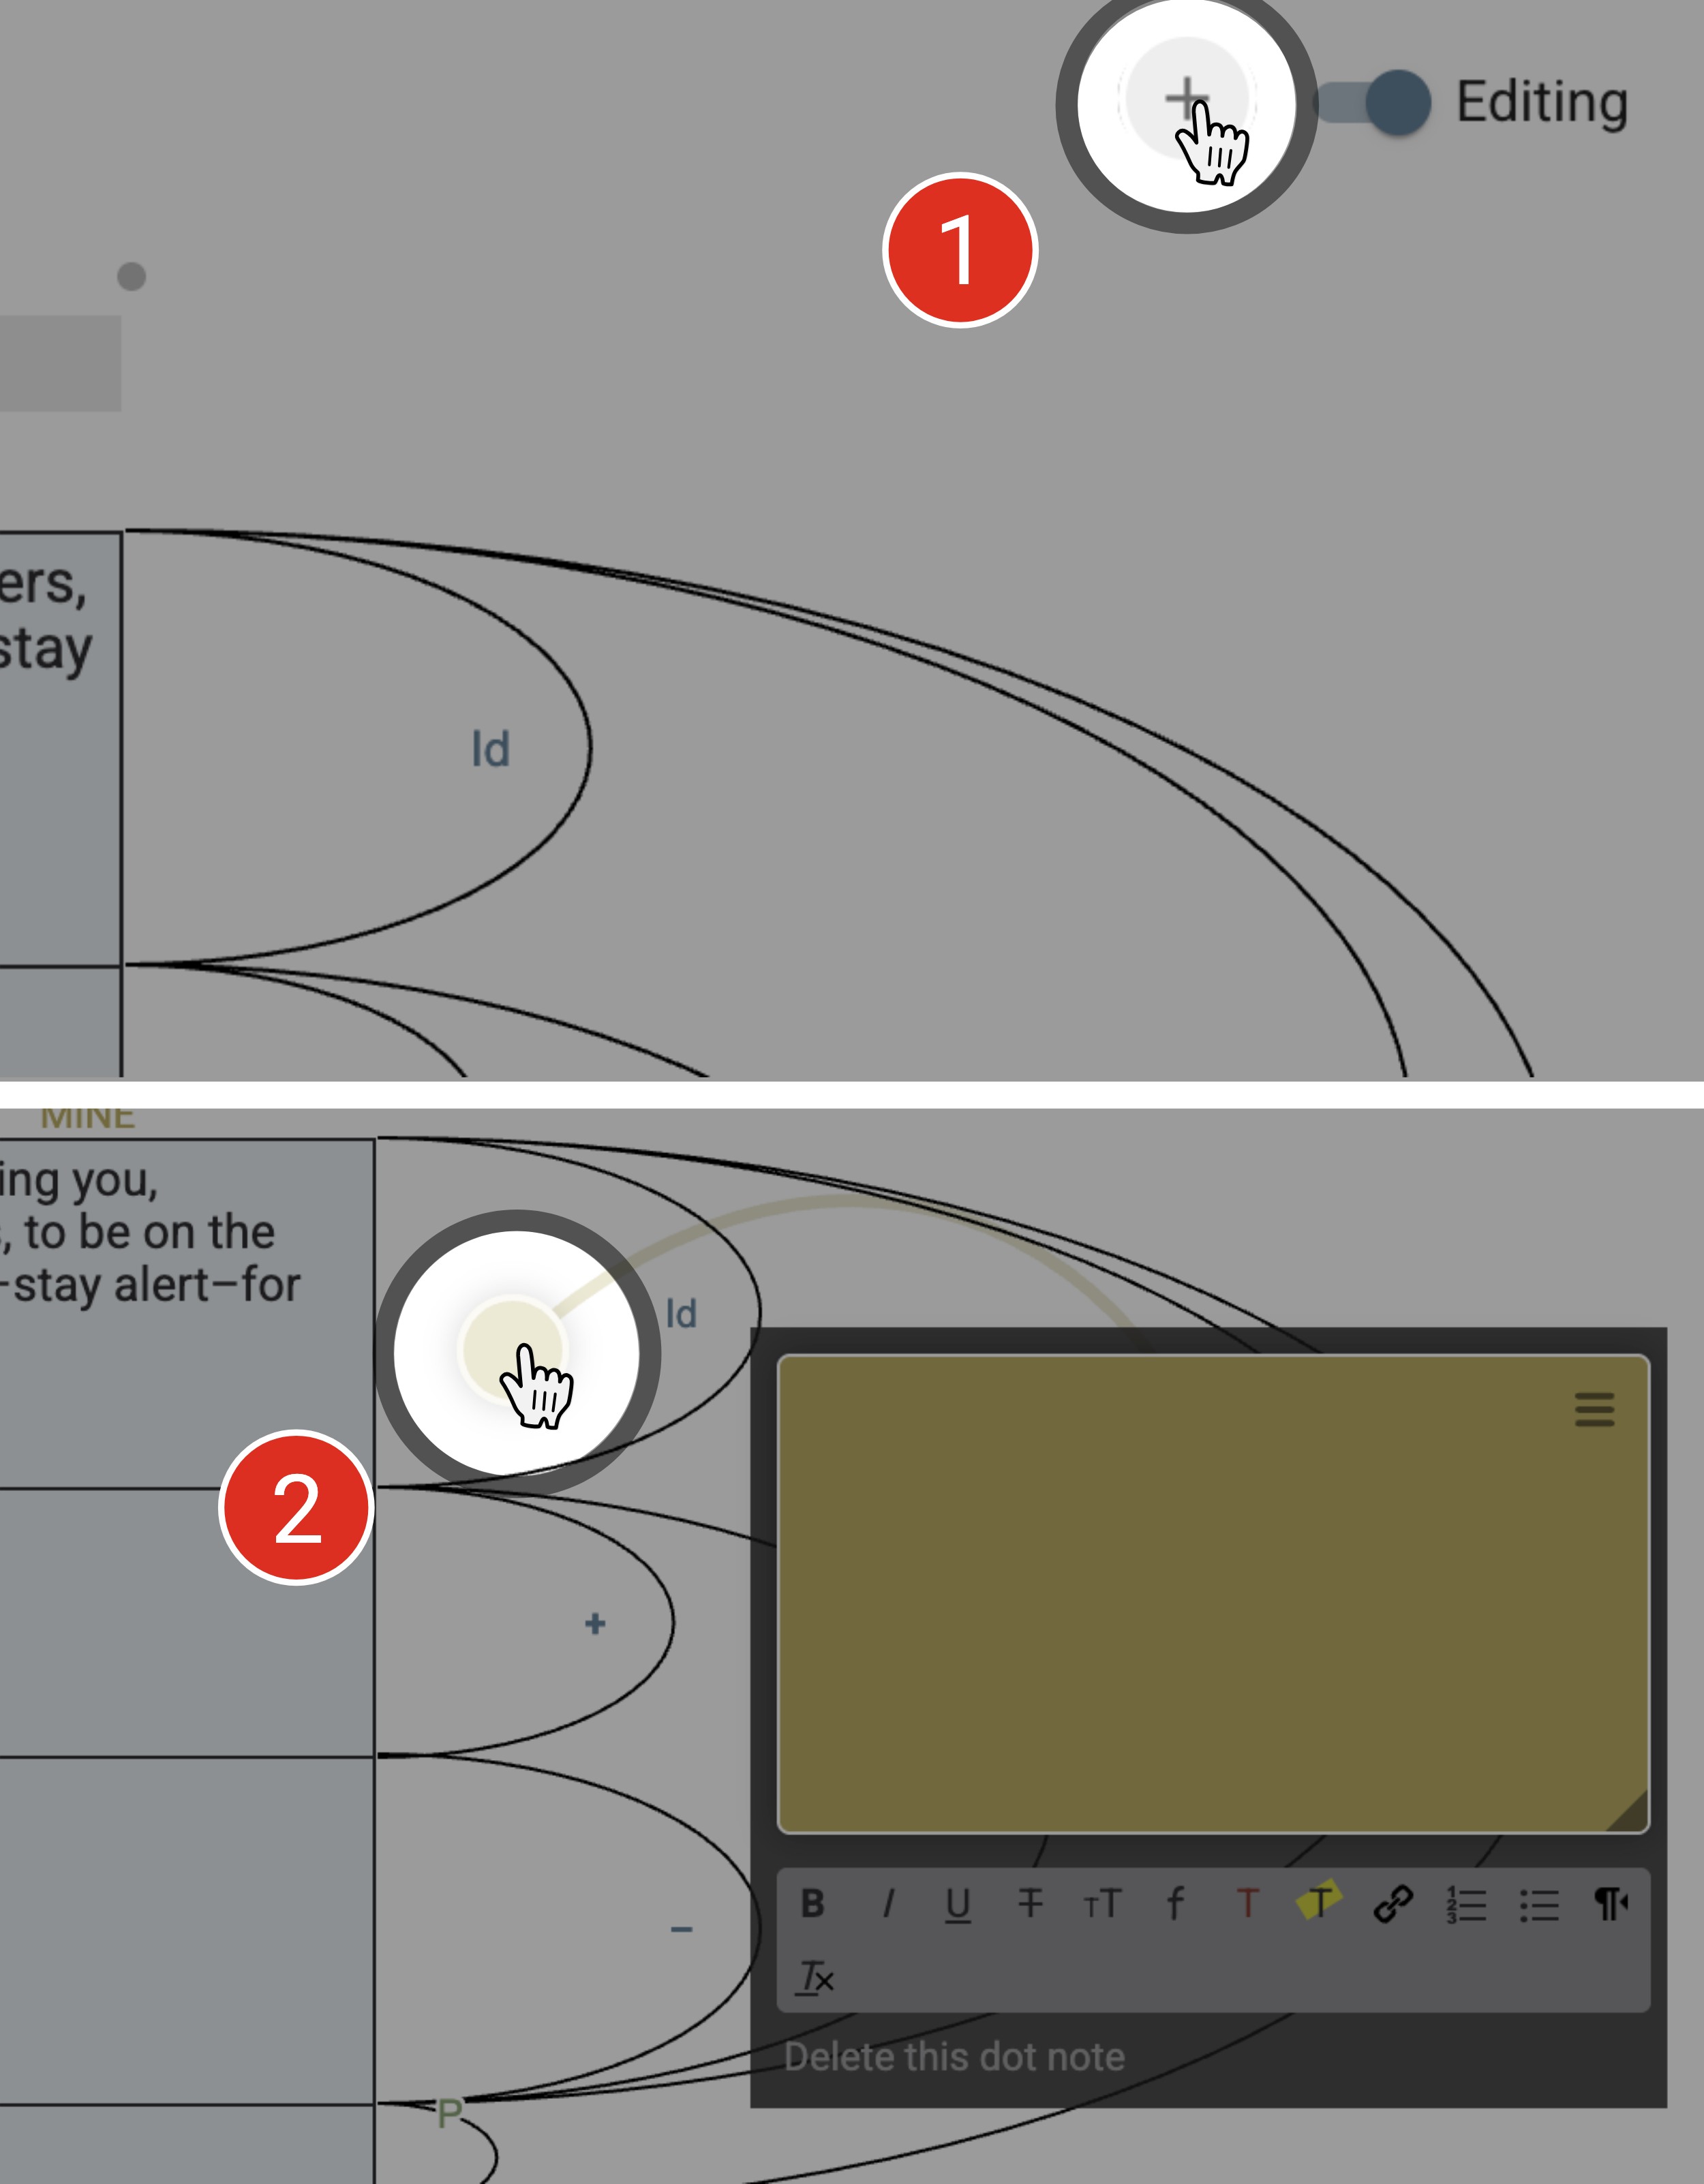
Add Dot Notes
In future lessons, you’ll be asked to add dot notes to create summaries. To do this, first ensure editing mode is turned on. Then, click the plus sign to the left of the Editing toggle button, and select the location in your project where you want to place the dot note.
You can change the location of the dot note or text box by simply clicking and dragging it. You can also open and close the text box by clicking the dot note itself, or the dot in the top-right corner of the text box.
Finally, while in editing mode, you can resize your text box by dragging the bottom-right corner. You can also change the color and category of your text box by clicking the three lines in the upper-right corner.
Main Point Summary
In future lessons, you will add a main point summary to finalize your work. To do this, simply click the gray box above the arc/bracket.